**Surfactant Leaking Got You Down? Here’s How to Stop the Ooze!**
(How To Fix Surfactant Leaching)
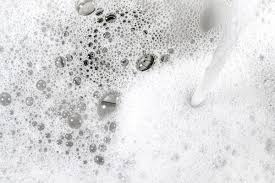
You know those weird white streaks or crusty patches that show up on walls or ceilings after painting? Maybe you’ve wiped them off, but they keep coming back like stubborn ghosts. That’s surfactant leaching—a fancy term for paint sweat. It happens when moisture pulls chemicals from fresh paint to the surface. Don’t panic. Let’s break down how to tackle this slimy intruder and keep your walls looking sharp.
**First, figure out why it’s happening.** Surfactant leaks love moisture. High humidity, rain, or even cooking steam can wake them up. New paint jobs are especially vulnerable in the first few weeks. Check if the room feels damp or if water sneaks in from outside. Fixing the root cause stops the ooze from returning.
**Clean the mess gently.** See those streaks? Grab a soft sponge and mild soapy water. Scrub lightly. Don’t go full superhero—scrubbing too hard can damage the paint. Rinse with clean water and let the area dry completely. If the stains come back, repeat. Patience is key here.
**Next, shield your walls from moisture.** Use a dehumidifier in damp rooms like bathrooms or basements. Crack a window after showers to let steam escape. For exteriors, check for leaks in gutters or cracks where water might creep in. Fix those first. Dry walls are happy walls.
**Pick the right paint.** Cheap paint often has more surfactants—those sneaky chemicals that leak out. Spend a bit extra on quality paint labeled “low surfactant” or “stain-resistant.” Matte or flat finishes hide leaks better than glossy ones. Talk to paint store staff. They’ll point you to brands less likely to cause trouble.
**Prep the surface like a pro.** Paint sticks better to clean, dry surfaces. Wash walls with trisodium phosphate (TSP) solution before painting. It removes dirt, grease, and leftover surfactant residue. Rinse well. Let walls dry for at least 24 hours. If you’re painting outdoors, wait for a dry weather forecast—no rain for a couple days.
**Apply paint properly.** Rollers are great, but don’t overload them. Thick coats trap moisture, creating a playground for surfactants. Use thin, even layers. Let each coat dry fully before adding another. Follow the drying times on the paint can—no shortcuts. A fan or open window speeds things up.
**Keep an eye on things.** After painting, check the walls now and then, especially in humid spots. Early streaks are easier to wipe off before they harden. If leaks pop up again, clean them fast. Sometimes surfactant leaching needs a few rounds of cleaning before it gives up.
**When all else fails, call in the experts.** Persistent leaks might mean bigger issues—like hidden water damage or bad ventilation. A pro painter or contractor can spot problems you might miss. They’ll fix leaks, recommend better paint, or improve airflow in your space.
(How To Fix Surfactant Leaching)
Surfactant leaching isn’t a disaster. It’s just paint throwing a tantrum. Stay calm, act fast, and give your walls the care they need. No one wants a home that looks like it’s crying weird white tears. With these steps, you’ll shut down the ooze and keep your paint job looking fresh.
Inquiry us
if you want to want to know more, please feel free to contact us. (nanotrun@yahoo.com)